
Oliver 20" Jointer, Model #12, Sharpening with Grinder.
- Chuck Hess just another sponge in the sea of knowledge
- Aug 24, 2023
- 3 min read
Updated: Sep 24, 2023

8-24-2023 Hey All, I get asked about this a lot so since I don't have a youtube channel, I thought it best to put it here. First thing is I love this jointer. I bought it out of a New York company's "model shop", then shipped it to my shop in Maui, then shipped it to my shop in North Carolina, then shipped it to my shop in Texas where it is now. We have been around the block together and we are old friends! So I have a millwork job and it is jointer sharpening day, you can see where we keep the grinder. Back in the day we did a cabinet job for a graphics place and they made us a bunch of stickers. Getting the grinder out of the box is a 2 man job, it is very awkward and heavy. Since I am working alone today I could ask my wife to help me or use the forklift. It would be better for our relationship to use the lift...


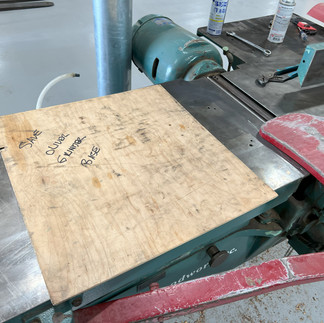


In the box is the grinder and everything else. Sorry about the "insane asylum green" on the grinder, that's the color the jointer was, I gotta get that painted the right color. Those are snap on wrenches which you have to have to loosen the gib screws. Today I am not going to reset the knives, I am going to grind and joint them. They can be ground and jointed 3 or 4 times before resetting the height of the the knives, which is a big timesaver. The piece of 1/4" ply is just to set the grinder down on so we don't scratch the table. Next we remove the jointing stone and stand her up and the grinder is precision located by 2 taper pins, in typical Oliver fashion. Then 2 hex bolts secure everything.


The out feed table has to be moved back about a half inch to line up marks.


The rabbeting ledge has to come off to allow the top dead center pin to get in there.


I start by grinding to reduce the old joining flat to minimal thickness. This is all about very light passes. These grinders will not take a heavy cut even if you wanted to do that.
When grinding the jointer is off and the grinder is on. When jointing the grinder is off and the jointer is on, we will come back to that. Couple of things here before the start. I only do this a few times a year so I have notes right on the grinder to help me. My grinder has a little back lash in it so I have to lower it below where I want to start and come up a little to get the slop out. You do not want to hit your dynamically balanced head with the grinding wheel. There are some stop marks on the dovetail to keep me from hitting the motor bell on the far side, it is hard to see that with everything in the way.


Dress wheel before grinding, I use a little diamond dresser from one of the bench grinders. Not much, just clean the wheel a little.


I go both directions on each knife hopefully one time, holding the height handle steady to keep it from creeping. The jointing flat should be about 1/32" to 1/64" and we are done grinding that knife. This machine has a 3 knife head, so 2 more to go and we are done grinding! I try not to grind all the way to the edge. Remove the TDC pin and now for the jointing stone.


You have to raise the wheel quite a bit to get the jointing stone on. Then bring it back down and with jointer running, you want to just kiss the knives. Go across and back and you are done. The jointing flat will hopefully be about 1/16" .


Now put everything back. Don't forget the out feed table returns to its original position. If knives are reset you might need to adjust the height of the outfeed table. I did not have to do that today. She cuts like a dream and looks good too! 1956 baby!


I do keep an old clipboard with sharpening notes for the jointer and planer. I made a note to self next time to reset the knives.


Thanks for looking and enjoy your project!