Oliver Model #66 Pattern Maker's Lathe Restoration
- Chuck Hess just another sponge in the sea of knowledge
- May 20, 2020
- 9 min read
Updated: Sep 1, 2025

2-3-2020 Oliver Model #66 Pattern Maker’s Lathe Restoration.
Hey this is Chuck Hess with another, in my humble opinion, great Oliver machine story. From the title this is an Oliver #66 Pattern Maker’s Lathe from 1943, a WWII veteran. So our part of the story opens in 2008 when Tom Reiley who is a dear friend, and a machinery mentor of ours gave us this lathe. If it was a motorcycle you would call it a basket job; the lathe was already entirely disassembled. The main casting had been outside since the mid 90's when Tom had acquired it from a dealer, is the story we got. This is a fairly large lathe weighing in at about 6600 pounds, according to the book, which means this was/is a large and daunting restoration project.
In 2010 we already had a couple of really fine Oliver lathes in our shop, and I really did not see myself having time to do a big restoration considering everything else that was coming at me right then. So, we had a chance to pass this along to Bill, another friend who was going to restore this with his son. Fast forward to late 2019 he reached out and informed us he had not ever had the time to restore and use this lathe and wanted to downsize a little, so he offered the lathe back to us in the same condition as when it left our place, along with a sweet South Bend metal lathe that my son had been searching for quite a while. I will admit I was a little hesitant to sign up for a big restoration project, but after some soul searching my son and I decided that this lathe was meant to be ours, and we wanted it back. After 10 years we went and picked her up early this spring and brought her home again. Wow that was surreal! Bill had gotten a birth certificate from Rich which was a real blessing for us. From that we learned that this lathe was sold to the navy and crated for export, destination LION Base #5. I think that was Pearl Harbor but we have not verified that. Please let me know if anyone has the history on that base. That would be super cool for us, since we came to North Carolina from living in Hawaii for 11 years. This was the first model #66 we ever got our hands on, although we have had a few go through our hands since then.
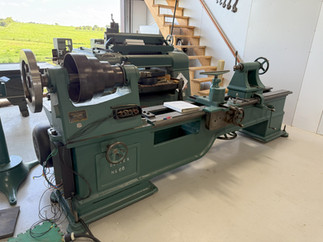
This is a very different approach to machine restoration for me, because usually I am in a hurry to get a machine done and on the production floor. But this time since we are still very busy in the cabinet shop I have started working from the smallest parts to the biggest. This approach also lets me work a little each day and still concentrate on my paying jobs, that’s one of the necessary pitfalls of being poor. There is of course a plandemic going on now too, but that hasn't really affected my family or business much. I didn’t know how this smallest to biggest system was going to work out but it has been a really cool and laid back way to approach things, and I am really enjoying it. Because of that I thought I would share the story so let’s get started. Here are the obligatory pick up and trailer shots;


We had about about a 4 ½ hour trip one way so this was an easy one day trip up and back. My son and I had a great time talking about everything under the sun, including our numerous machinery trips from back in the day, including the epic trip we made when picking this machine up in New Jersey the first time. This trip was smooth sailing all day long. I’ll post a few more pics of arrival back at the shop.


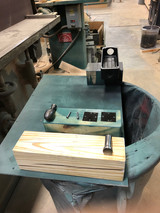
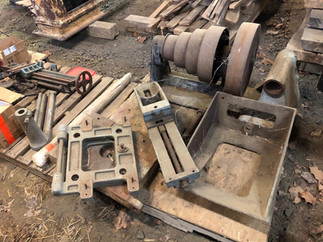
Like I said before, my strategy this time was to start cleaning hardware and small parts first. Here's what that looks like;


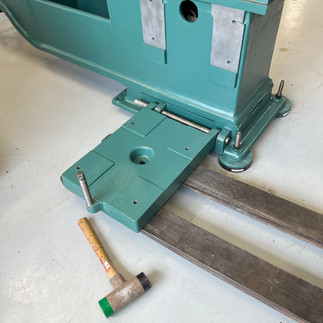
3-13-2020 Now for some fun stuff, the compound! I loved finding that navy anchor stamped in the top of the compound, it had been hidden for a long time by a thick layer of rust. This lathe also has two anchors just like that stamped in the "brass chicken" badge, we think that is super cool. I do wonder if those were stamped by the navy or the boys at Oliver? Another surprise was the solid bronze locking screw at the bottom, most likely fabbed by some naval machinist along the way.


Moving up the food chain a little bit here are some more components, the gap bed clamp;


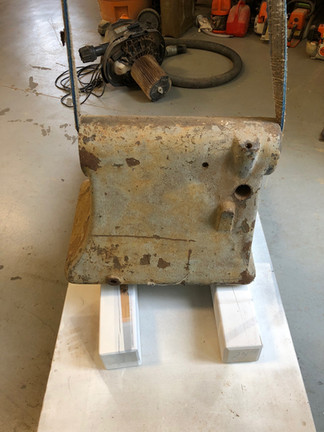
Here is the tailstock spindle;


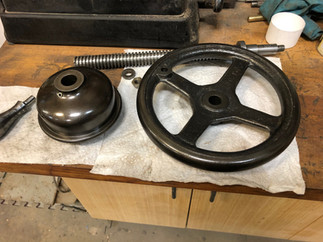


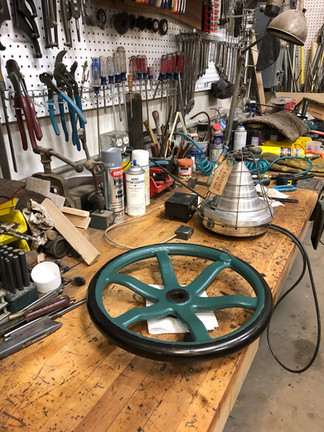
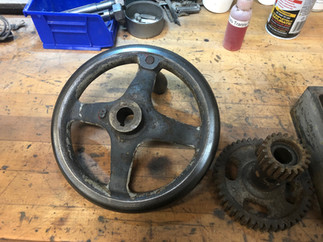
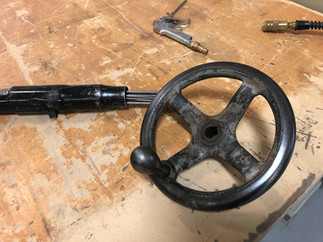
Tail stock crank;


Headstock Door:


Misc. Parts; banjo from a #20-B


So we have been remodeling the mezzanine in our shop and one of the things I have really wanted to do was build some nice storage for Oliver and machinery parts. Now that I have been cleaning and restoring all these parts we really needed a place to organize them. Here's what that looks like;


Here is the original push button station which is incredible! It is a Cutler Hammer that has a cast iron box and cast aluminum front; talk about heavy duty. Also the silver contacts were shockingly like new inside. This is the most awesome switch I have ever worked on!


Motor Badge is in rough shape; Hard to read amps and RPMs but I have a pretty close guess on those and got some info from the "birth certificate".


So its now 11-15-202o. Seems like we have been working on everything else besides this lathe. But here is a very cool dividing plate Tom Reiley had made for for his 20-D lathe. The ring attaches to the 12" outboard hub and there are 60 divisions around the outside. I can't wait to mount this on our lathe when it is ready!!!!


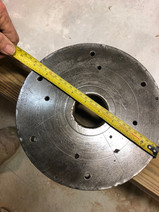
February 3, 2021 So I scored a 9" faceplate for the 66! That's an unusual size but I am going to like it!


Feb 7, 2021 I am trying hard to keep this project moving forward, but we are so busy it's not easy! I started cleaning these parts a while back and have finally gotten around to finish them. So here is one counter shaft pulley that was off the lathe when we got it and lower compound piece.


3-15-2021 We have a major league table project coming that will have a large turned pedestal. To do this we need a large lathe, so it's battle stations on the restoration project! We started by getting the headstock out of the barn.


March 17, 2021 This is the first time we have tested the fit on the faceplates we have. The spindle threads on these big lathes can be a little different so I just wanted to make sure. Everything fits just fine!


3-18-2021 Headstock disassembly. For as long as this was in storage, everything came apart amazingly well!!! Easy Pezy! So Oliver part numbers start with the model numbers of the machines that the part was originally cast for. Then there is a dash (or two) and then the part number. From this we can see that the headstock casting is the same one used on the Model # 18 Lathe. The boys at Oliver were good at repurposing castings to reduce labor of a master pattern and machining jigs by using ones they already had.


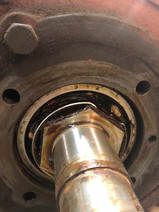
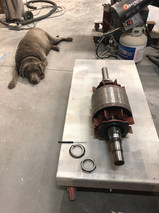
Now its time to order bearings and a few other parts. We are going to do our famous oil bath mod on this one too! Here are some more shots of pulling big taper bearings, reaming the spindle #4 Morse taper and finish cleaning spindle shaft.


Next is the oil bath mod and plugging the old grease zerks.


I also want to start thinking about the electrical. Mainly, I have a super cool Cutler Hammer vintage 2 speed starter, that I would love to use on this build. Unfortunately the lathe did not come with the original starter. One issue is that the starter I have is setup for 440 voltage and the motor is 220 volts only. I am just a woodworker and although I am pretty good at getting machines to work, a 2 speed starter is just about beyond my electrical attention span, hahaha. The other thing I am thinking about now is that this big ole motor hasn't been powered up in like 25 years or more. So will it work or do I have to send it to the motor shop? We will find out this week! Here are some shots of the starter;


4-7-2021 Headstock is moving into the booth for prime and paint!


4-9-2021 Headstock out of booth for reassembly! Now I feel like I am restoring a machine! Up until now I just felt like I was cleaning a lot of parts.


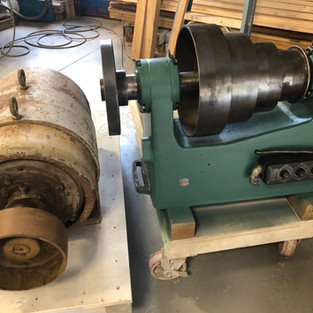
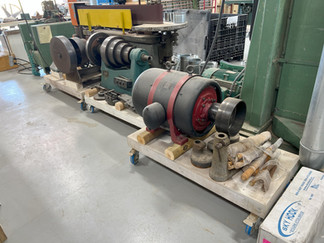
In the meantime the big ole motor came in from the barn!


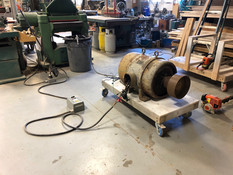


This was amazing; for being out of action for 40 years, both speeds work fine! Fired right up!!! Bearings are understandably shot, and will be my next project. Here's the motor and headstock together.


4-29-2021 Here we go starting the little ole Howell "Red Band" motor work! There is no part of this motor that is not awe inspiring!!! I am thinking, I'm going to have to do something a little more special with the paint on this motor. Boring old Oliver teal just won't do!


A side note: we started getting some compound caps cast 2 years ago at Cattail Foundry. Since getting them back from the foundry in June of 2019, they have been to 2 different machine shops and finally got them back to us just now! These seem like a simple part but there is still a fair amount of machining involved in getting these across the finish line. I did have to test the fit on these and the fit is really nice! The raw castings are pretty cool, it's like a "war" finish. The longer you wait for something the sweeter it is, so these are pretty sweet!


5-11-2021 More motor work;


5-12-2021 Tried the indexing ring on the headstock for the first time! How cool is that?


5-13-2021 More motor work;


All Right its bearing time!


Here's a little video of the after new bearing test:
Next is paint:


Send off for Jesse; on July 3rd 2021 we unexpected lost the best friend and shop dog ever. He was in a lot of the restoration photos and if he wasn't, he was always there with me as I was working. He laid down to sleep and didn't get back up. He was such a fixture in the shop and I miss him terribly.


Trying to move on without Jesse on this restoration has been tough. After a long break I started working on the compound, one of the last "small" pieces left. This has a non original aluminum block which I just realized was a previous owner mod, to move the crank handle to the right side of the saddle. The original holes are still there, on the left, and will be easy to put back if I don't like it, but for now I am going to leave it on the right. I am assuming that some old timer had a good reason for doing that mod. Maybe it will get the compound closer to the headstock when the gap is opened?


We got the tailstock and counter shaft out of the barn.


8-25-2023 This restro was interrupted by a little shop/business move, to Texas. Might be our last great adventure. We arrived in Texas almost 1 year ago already. I did take 4 months off, to catch up on beauty sleep, then we were having the new shop built. I had a great electrician and plumber, but did almost all the interior fit out myself with a little occasional help. So a lot of you, well maybe 1 or 2 people, asked for photos so here's the new digs.


Here is the new restro bench, or Fab 2 as we call it, and grinder row. Everything is about 80 % put together.


This is Jesse's daughter she is about 10 now. She's my new bestie and shop buddy!


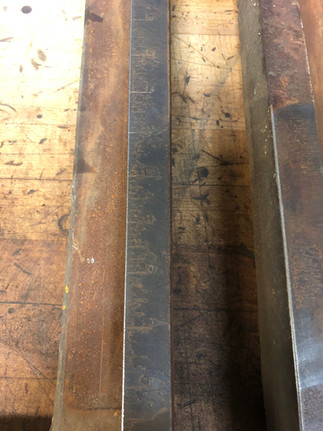
Back to the 66 lathe, during the move I was concerned about this one piece in particular, the rack for the rack and pinion to move the tailstock. It seemed an awkward thing to move, but made the trip just fine. So I saw that on the floor and said self you need to clean that.


Here is the status of the rest of the parts;


I am looking forward to bring this lathe restoration across the finish line. One of the many fun things we have planned for our new home in Texas! I invite my Texas neighbors to stop by for a shop tour and a meet and greet!
6/4/2025 Well next big move has been to take the main casting to an local strip tank. Here are the load up shots;


Arrival and unloading at strip tank shop:


6/25/2025 Pick up from strip tank shop: we sprayed her down with shellac right away.


Arriving at Texas shop so exciting!!!


7/28/2025 Paint Prep. I am taking a week (or two) between jobs to paint this.


7/29/2025 Prime & Paint


7/30/2025 Reassembly


7/31/2025 & 8/1/2025 Paint and reassembly;


8/2/2025 Parts and more assembly;


8/16/2025 This was beyond words how amazing this came together! This lathe was in pieces for over 20 years and in at least 4 different states during that time. I found pieces in every part and corner of my shop, unbelievable. One thing I did not find, and I don't think we ever had was the under bed tailstock clamp. Here is my son modifying a banjo clamp for that;


In the background of all this, as I talked about earlier in the thread, I have been working on a very cool Cutler Hammer 2 speed starter I had from another Oliver lathe. It did not start life with this lathe or this start/stop station but it is vintage correct for this build. Did I mention there is not a wiring diagram? I need some help with getting the starter and start/stop station talking to each other correctly. Also the starter and previous machine were 480 volt and the new host is 220 volt only, so I have replaced coils and heaters already.


8/31/2025 The last big piece is the countershaft;