
Rare 1972 Oliver #299 ITCH Head Planer Full Restoration!
- Chuck Hess just another sponge in the sea of knowledge

- Oct 25, 2020
- 10 min read
Updated: Jan 25, 2025

Rare 1972 Oliver #299 ITCH Head Planer; round body castings W/ adjustable bed rollers!
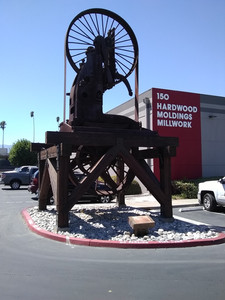
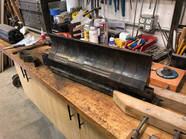
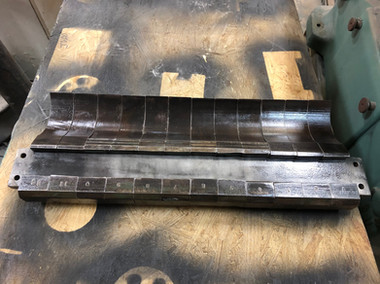
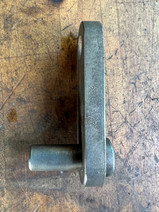
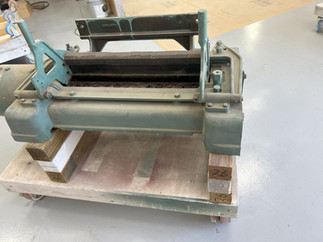
Hey All, this machine story starts with Ron, a friend of ours, who also happens to be my planer mentor since he has had about 30 of these Oliver model 299s, calls and tells me there is an Oliver #299 planer in an auction and I have to buy it. My response was I already have a #299 planer that we like very much, but that did not slow him down. This one is a rare #299, he says, It is one of the last round body castings and has the quickly adjustable bed roller handle built into it. He told me that Rich Fink said there were only "6 or 8" of these made before Oliver went to the square body design. Let me ask right now if anyone reading this has any accurate data on this please let us know. So he then proceeded to tell me that if I considered myself an Oliver collector, that I should take a hard run at this machine because they are very rare and I might not see another come up, ever. Ok, I was starting to waffle, then he added some more backstory. This machine is at the "best lumber company in southern California", and Ron has been in the mill shop several times and seen the machine and has been keeping an eye on it over the years. Ok this seemed like an inside track tip if there ever was one. So even though we just rebuilt the 1958 #299 planer that we have 2 years ago, which was a lot of work, I looked at the auction and placed a bid. Here are the auction pics;


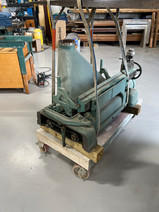
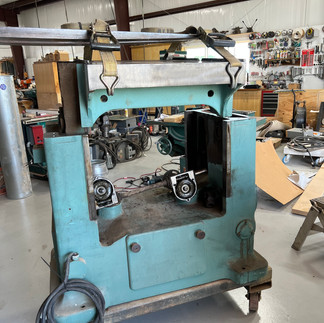
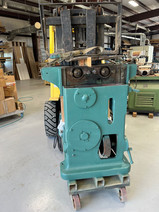
By the way ITCH is an acronym for-Inserted Tooth Carbide Head. So the planer looked pretty good in the pics, but I was telling myself that I don't need the project right now, because we are super busy in the shop, there's a pandemic going on and I won't be able to pick it up myself since it is in southern California, it doesn't have a grinder with it and it will probably be a lot of money. But other than those bumps in the road, I was starting to feel it! That was back in August and, against stiff competition, we did win it! I knew this was going to be a slow moving project but that was OK. Freight took forever partially because I used the cheapest carrier and partially because the plandemic has every thing slowed down. 9-24-2020 She's here! Whu Hu! Here's the arrival pics;


Here's a few pics Ron took of the location where the planer was;


So now its 1-23-2021 and we finally got a chance to move the planer and start doing a little work on it! Started knocking the chili off the table and removing the chip breaker. This planer had been painted by hand and never used after that, little kooky. We can tell for example because the guy painted the table ways and it can be seen that they have not moved since then. I really love this machine already; there was a missing tooth in the cutter head and I suspected that the cap screw had been broken off. That was not the case so I did not have to start by drilling in the cutter head. We put a tooth, wedge and cap screw in and fired it off for our first time, she runs so quiet!


So how these things go is the machine is the teacher! I'm not seeing much wear, but the fight is going to be all the storage rust and the machine was painted by hand so there is a thick coat of clunky paint over all the fasteners and supposed to be moving parts. I kind of started with the segmented chip breaker because it was going to be in the way. Everything was rusted and painted tight so it was a lot slower going than I expected. I also had to move to a real bench instead of that mobile cart I was planning on using. Each one of the toes was a struggle to get off the bar, no way these would have worked properly without restoration.


More chip breaker fun! I went ahead and replaced all the springs while I was at it too. Finished with a coat of shellac.


Here is a shot of the table gibs showing the awful paint. I am slowly getting the table to move because of the painted ways. I don't think the table has moved in a long time.


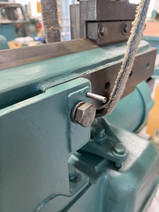
Feb 18 2021 Next is the table rollers quick height adjustment mechanism, which is the exciting thing about this planer. This assembly had some damage to the scale, but I think I can get a replacement from Rich at Eagle Machinery. When I got the chip breaker springs from him we had a little bonding experience because he is restoring a #299 right now too. That was cool. This set of parts are almost all stamped with the Oliver part numbers, I don't know why, but I like that.


May 30th, 2023 and a little over 2 years has gone by. We have moved our operation from North Carolina to Texas and the Lord has blessed us with a big, new, beautiful shop to set up. During the move I actually sold our 1958 #299 planer so I would have one less machine in the mix. Now it is time to fix this one as it is our only planer now. So during the test fire of this one the first time, I noticed that the lower bed rollers were not turning; that is where I left off before the move. Upon examination the lower rollers are locked up tight. Upper rollers and everything on left side of machine is working properly.

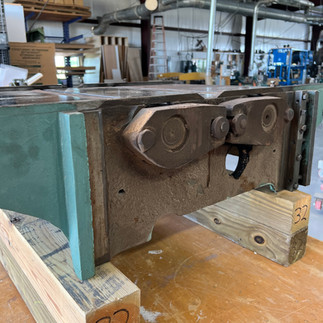
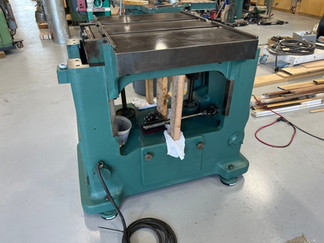
Here is a shot of the planer in our new Texas shop. I decided to just go ahead and pull the top off so I could see what is going on, and do a lot of cleanup because everything is very rusty.


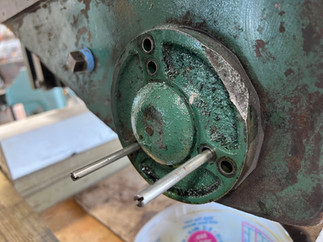
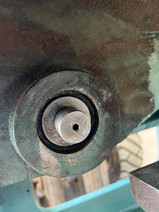
This is really pretty quick, if you have a way to lift it. There are only 6 bolts, but one is a real bugger to get to. Now after removing the cover plates I can see that the right side gear lube sump has never been serviced and is about half full of ancient chips. The chains are completely dry and a little rusty. I removed the drive shaft between the U joints, under the table. Nothing turns freely so I'm going to dig deeper and pull the table too.


That last pick shows the fill plug hole for adding gear lube. Looks like no one has ever done that yet. I am going to add Mobilgear 600 XP 460, but I have a lot of cleaning to do first. Good news is that it still looks like nothing is broken! Its weird to see this machine without the top; I keep wanting to call it shorty...
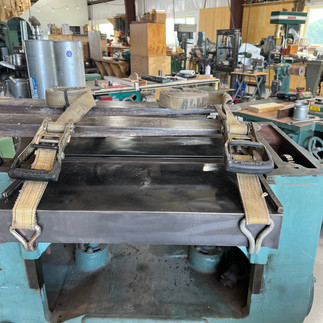
June 22, 2023 I have been busy installing dust collection in the new shop but now the table is coming off. I did not remove the gibs, only loosened them. After that the handwheel has to come off, then disconnect the grease lines. As you start to lift you have to disconnect the jack screws so you can get the handwheel shaft out of the casting hole. I rigged the top with ratchet straps; I know these are not rated for lifting, so don't do what I did. Here's some pics of this process and landing on a table.


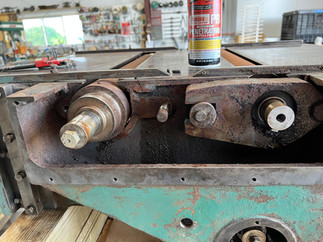
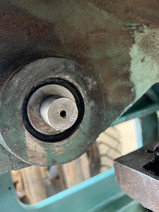
Now I discovered what the issues were; the gear lube sump is completely dry, rusty and filled with chips. The bearings on the lower sprocket are locked up and look like they have been underwater. The bearings on the rear bed roller are also locked up. Still nothing looks broken so "all ya gotta do" is disassemble, clean and re bearing.


It was the right move to pull the table because everything is so rusted up it is going to be a fight to disassemble. Those lower sprocket bearings are 6206 and I have those in stock so that's really cool when that happens. Bearings looked to be original MRC #206 made in USA. That lower sprocket was not going to move and I had to use heat. I don't like to heat things because it takes so long to cool down. In my experience stuck parts usually pop on the cool down cycle, so it takes some time. I heat for about 50 seconds then go clean parts for a long while before coming back to that. Here is a video of that.
So the cool feature about this machine is the adjustable bed rollers, you can see the cams in that video above. Everything about those and all the linkage is all locked up, another good reason to pull the table. I'll save that project for last. The sprocket did pull after cooling with a little PB Blasters help, there's only room for a very small puller to get in there. Disassembly can move forward, yay.


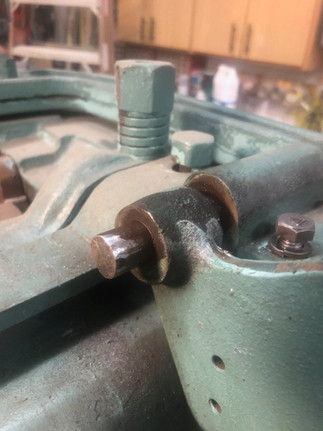
I can see that someone has tried to do something in here before; there are pecker tracks on the lower sprocket and shaft. Everything cleaned up nicely and still no broken stuff. Time to replace the old MRC 206 with the new NTN 6206 bearings. The bearing in the photos is on the universal side the outer bearing will be last.


On to the bed rollers. Because of their weight, I have decided not to remove them from the table cavities. Both bed rolls have a heavy coat of chili but I will be able to clean those from above with the wire cup on the angle grinder, once I get things turning again. So those bearings are old MRC #207 and I will be replacing with new NTN #6207. I need 4 and only have 2 in stock so I will be ordering bearings from Accurate Bearings after all.


Since I have 2 of the bearings for the bed rollers I decided to install both on the chain side so I could get that side all set up. The other side will be a lot easier when the other new bearings arrive from Accurate.


Now that the drive side is done on to the adjustable bed roller stuff. Just had to clean everything and used never seize on the cams and linkage. Got all that freed up and working smoothly. So much easier with the table out of the machine.


Here is a short video of the bed roller adjust action.
6-26-2023 So now I have been having this internal struggle about not having time to paint this machine now. The good dog finally won that battle and I got my heart right. If I didn't paint this now, while I have it completely apart I would be mad at myself every time I used this planer. Everything else will have to wait.... Thus begins the paint prep while simultaneously working down a list of small projects. It is usually during this process that I am struck by how awesome these castings are and how much machining went into these old machines! That base is a one piece casting, just amazing!


My advisor approves of the decision as shown above. It is a beautiful day and this is the view out the back door of the shop.


I have a new wire wheel I am trying out and I like it for light duty cleaning, the first pic. Here's old faithful in the second pic, better for heavy rust busting. I like wire wheels, the don't remove any metal and I like the finish.


Here are my big restoration guns; the first is 12" Baldor grinder, with a double wire wheel and 2" wide stone, that pretty much runs non stop when I'm doing this. The second is a smaller Baldor with a Beartex wheel for polishing and a cutoff wheel.


The table on this planer does not have the trough of shame; where the cutterhead has contacted the table. The other 2 planers like this I have owned both had that. This machine has a nifty little no go feature that my other ones did not. Those 2 little bolts on the side curbs simple but effective.


The base and table are mostly painted and I am itching to get those two reunited. I am still waiting on bearings but I decided to partially reassemble; as in not put the table all the way on. I can start consolidating parts that way which might make me feel like there is a little less chaos around here.


Yup, those are genuine jack legs you see there! I also wanted to get it off that cart that its been on for almost 3 years! I had some Sunnex anti vibration mounts which worked nicely. The table is still high enough that I can get to the bed rollers to install bearings when they get here.


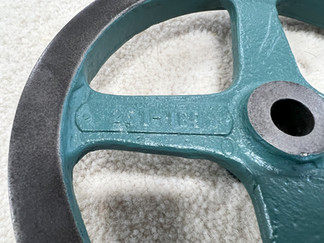
Also did a little badge work.


Getting the handle ready.


Still have a lot to do. These are the remaining parts that are cleaned and prepped.


Had to backup and do a hack. The gear lube was leaking either through the bearing or around the lower universal shaft. I took it all back apart a couple of times and tried several different things to no avail. What finally worked was to put this oil seal in over the 2" O.D. shaft spacer and used a little form a gasket on the shaft and keyway. Getting that seal in there was like putting a girdle on an elephant, but it worked like a charm.


Putting the last bits onto base assembly. I am geeking out over the bed roller adjustment! That is really, really cool!


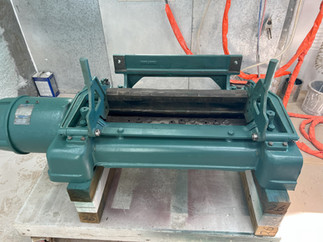
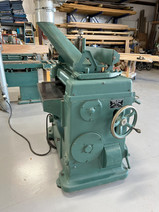
7/1/2023 Now the base is done and moved into place. This is the first machine you see when entering the shop so I'm very glad it is so beautiful now! It was definitely the right decision to go ahead and paint it now!


Now all ya gotta do is paint the upper half, more to come soon!
9-18-2023 Today is the day to finish the planer restro! It has been about 6 weeks since I pulled off, man time flies! We are going to paint the planer top half today and hope I get the 2 halves together today. Here's the start;


This is the paint I am using. I had 24 of these custom made for me through our Sherwin manager, quite a while ago, in 2011. They have been really great to use on this long drawn out restoration. We are still using shellac for a barrier when needed and rattle can primer when needed too.

Start prepping and spray the small bits first;


I did have one part that needed some panel beating and I don't like bondo;


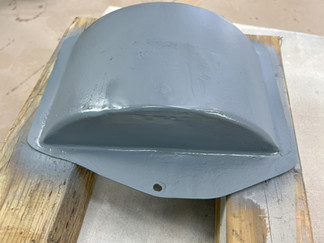


Now prepping the big piece;


Now a little paint:


Masking tape off;


Now we need a dating service to get the 2 together;


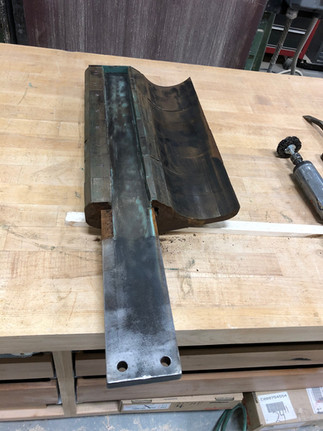
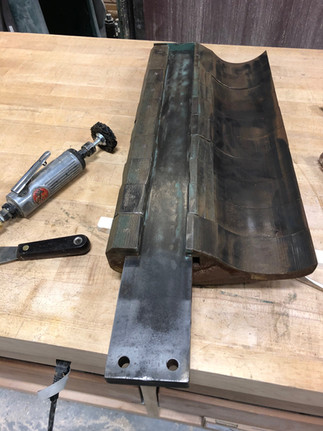
Top is held on by 6 bolts and there is a gear to reinstall and viola! Oops there is the grinder bar I forgot about because I painted it a long time ago; this is the next morning;


The thing I did need to paint is the grinder bar hand wheel;


Now she is all put together; video of planer running!
Wow this is so beautiful and runs so smooth and quiet! It was worth all the hard work and patience over just shy of 3 years! Here's some glamour shots of her hooked up to dust collection.


Now I am going to setup the ITCH grinder and sharpen this for the first time since we have had it. I will make a separate post on that because I get asked about that whole procedure often.
Thanks for looking! Enjoy Your Projects!


Wow ! That is a very nice #299. Mine is the same except for no feed roller adjustment. It came with the grinder sharpener. I did not have to do much to restore it. There was no rust. I am an old Oliver collector.